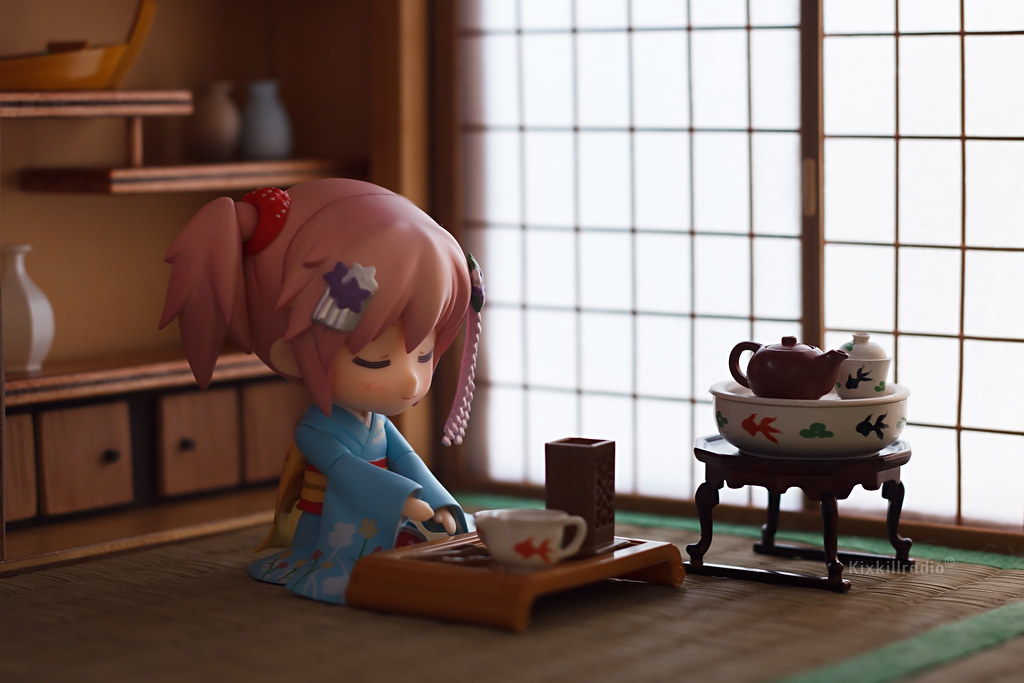
Today, I am showing you how I made the Japanese House Garden scene that you’ve seen from my Nendoroid Sakura Miku: Bloomed in Japan photos.
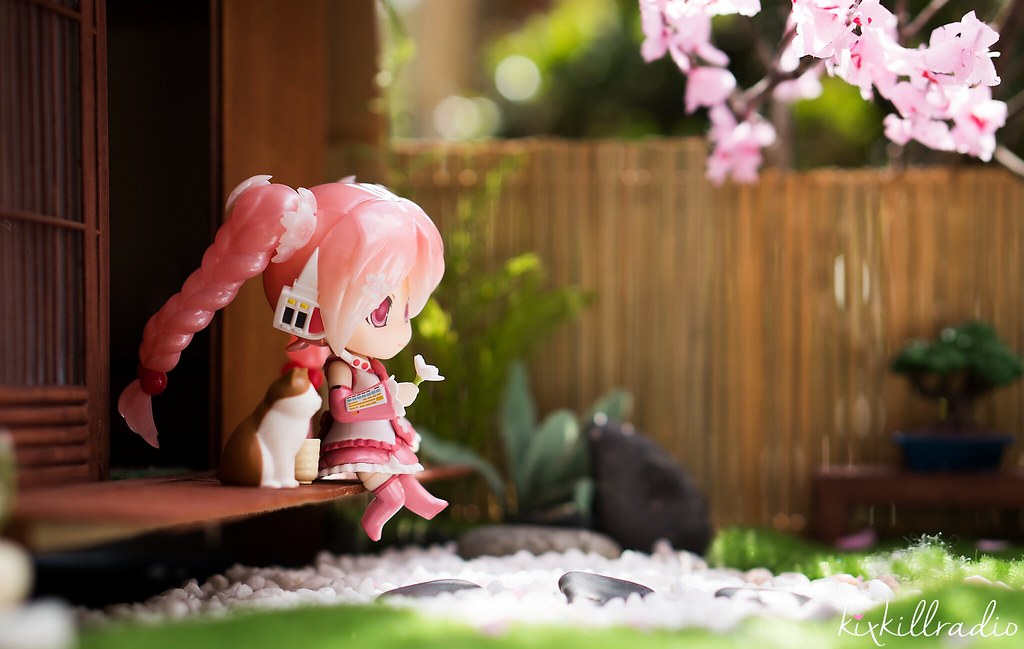
I googled inspirations and analyze if I can pull it off with the materials I currently have. I always want to take photos of my figures in ‘engawa’ or Japanese porch/veranda.
(Photo credit to respective owners)

I have built a Japanese room before and I’m sure you’ve seen this one in my past works and workshop. (See Photo of Madoka)
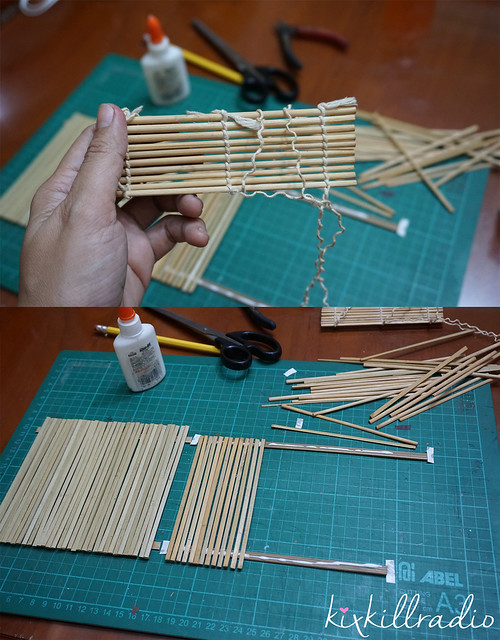
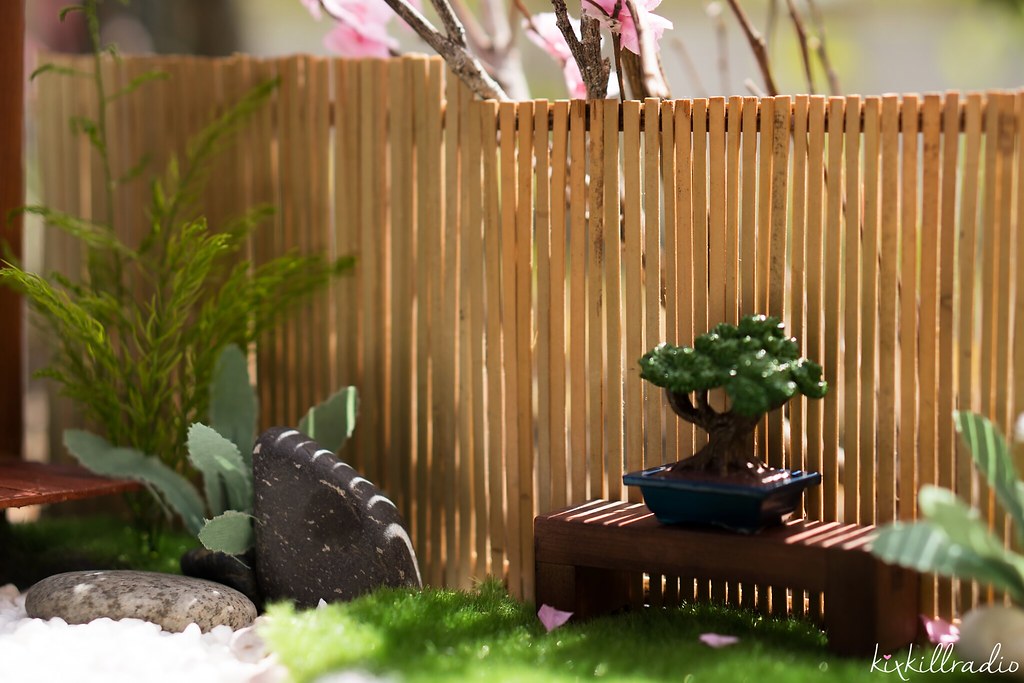
The Bamboo Fence
Materials:
- Sushi mat (made of bamboo sticks) – available at Daiso or Japan Homes stores. I bought mine from a surplus that’s selling various Japanese Home items.
- Glue, cutting pliers, tape
The bamboo fence will help block distractions in the background and would focus on the garden.
The Garden
Materials:
- Fake grass
- decorative stones
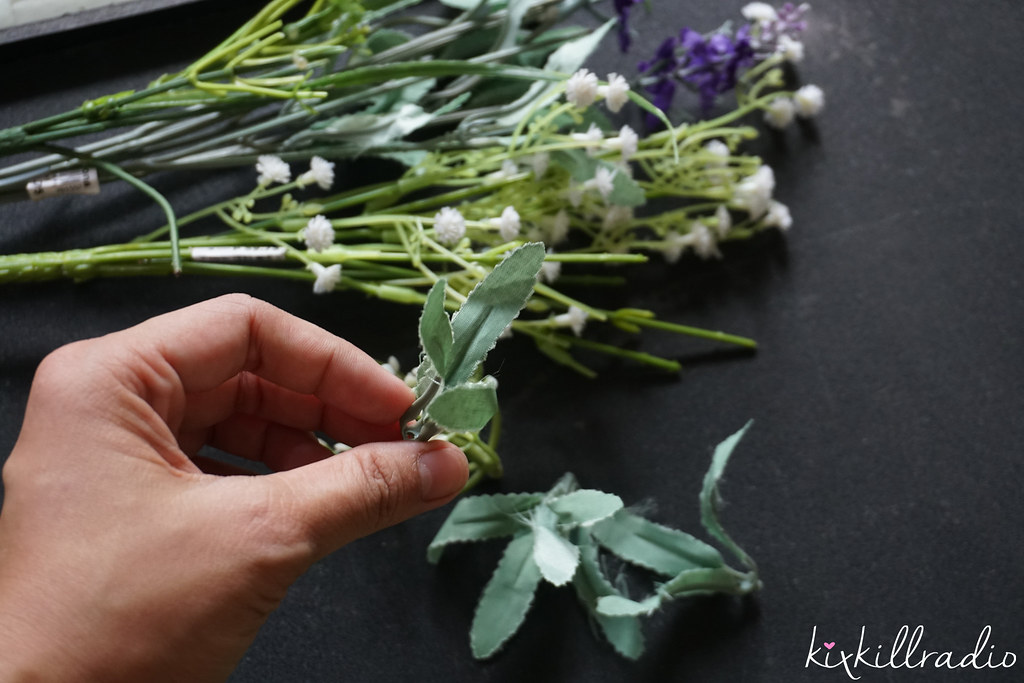
- artificial flower / plants
- foam board or ply wood for the base
Most of the materials are available at local home centers – artificial flowers section. I bought mine at Landmark, Makati (Philippines). Foam boards are available at your local school supplies.
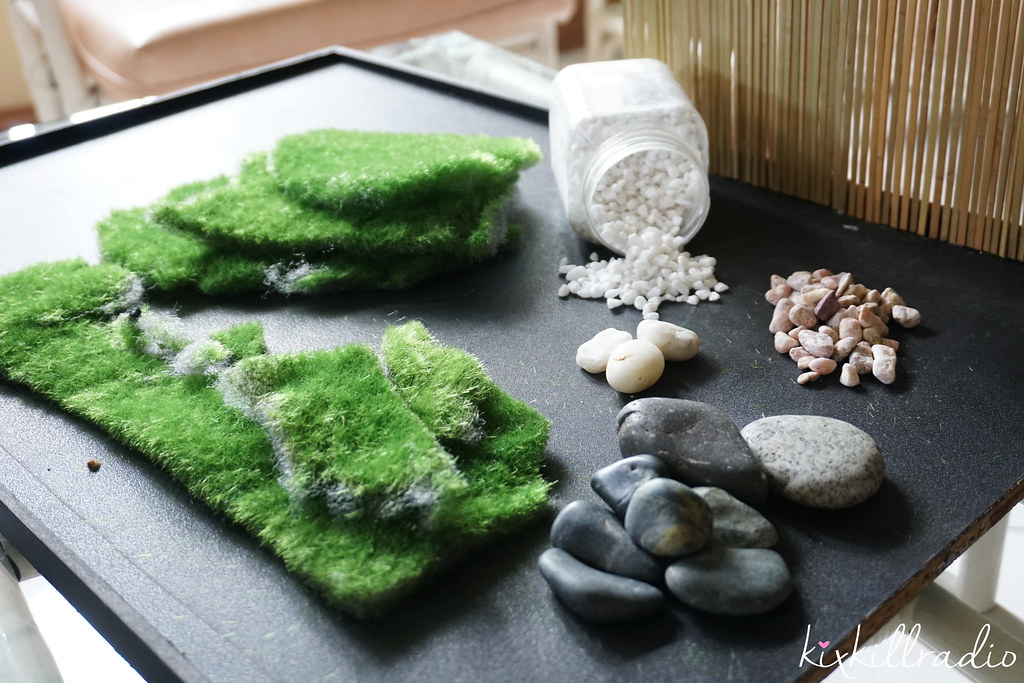 We have a little zen garden at home so I borrowed a few stones to complete the set. I made sure that the artificial plants aren’t so big and should be Nendoroid/Cu-poche scale.
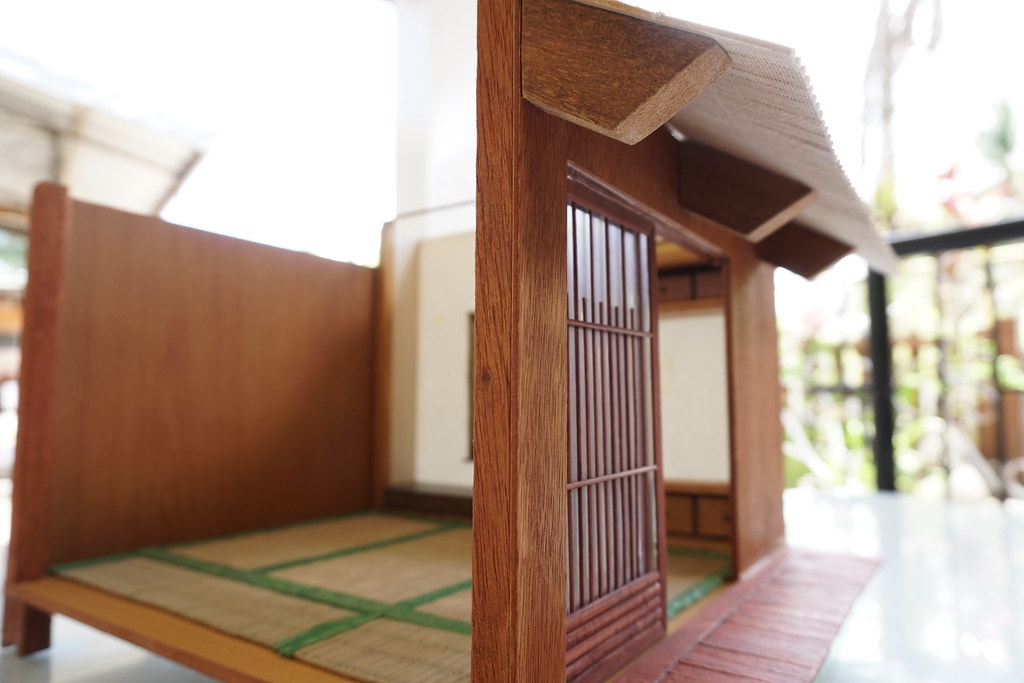
The ‘Engawa’ (Japanese porch)
Materials:
- Popsicle sticks
- A long strip of sheet wood
- cardboard
- glue
- wood stain (for a natural finish)
I cut popsicle sticks according to the size I want and glued them on a cardboard. 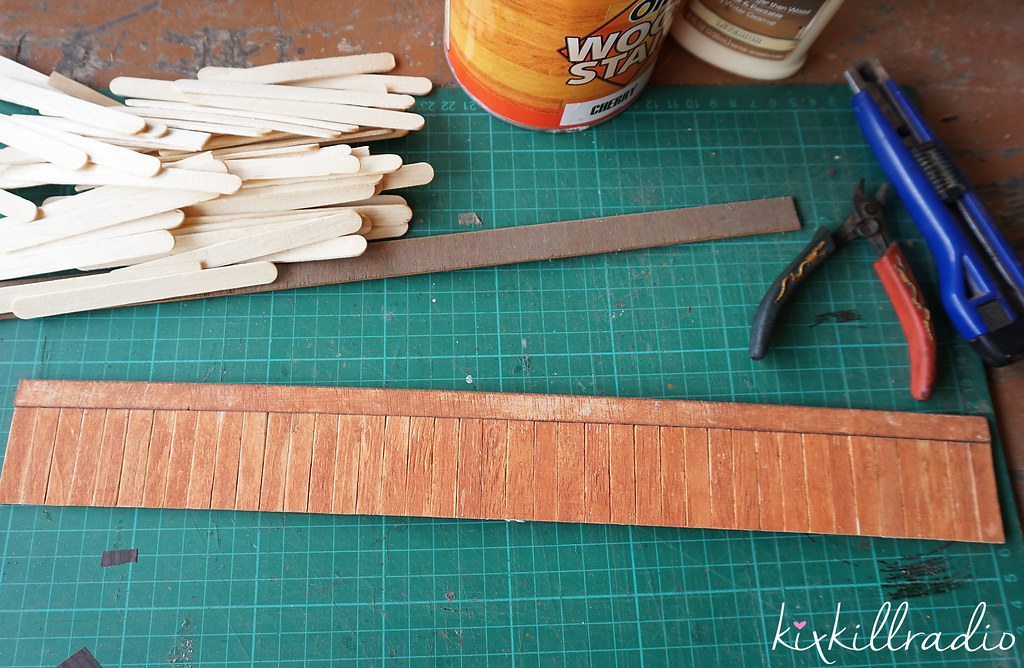 ‘Engawa’ is the perfect spot for my Nendoroid to eat their watermelons during summer or sip their favorite tea in spring time. I attached this part to my already-made Japanese room.
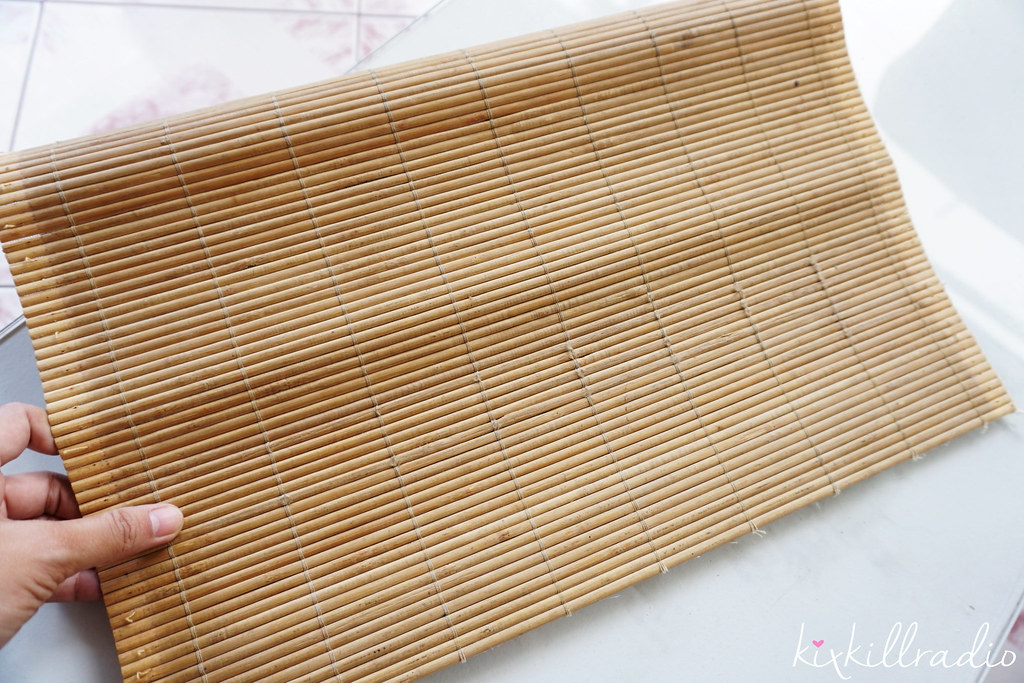
The Roof
Because I don’t have much time left, I had to look for various materials that would work for my diorama set. I found this big bamboo mat from a local Japan surplus and used it as a roof.
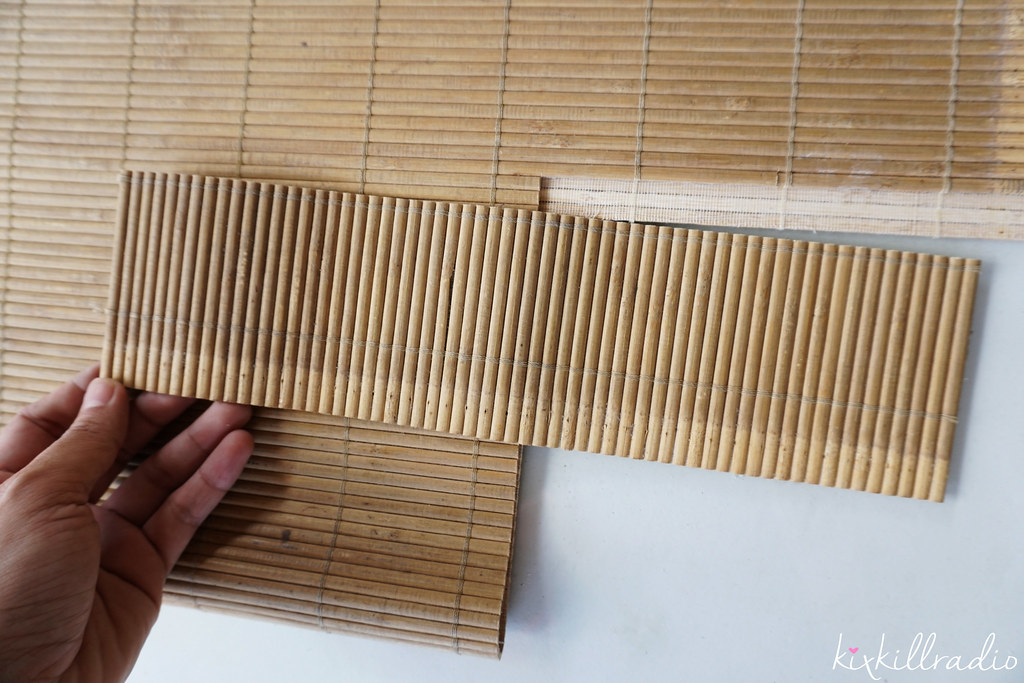
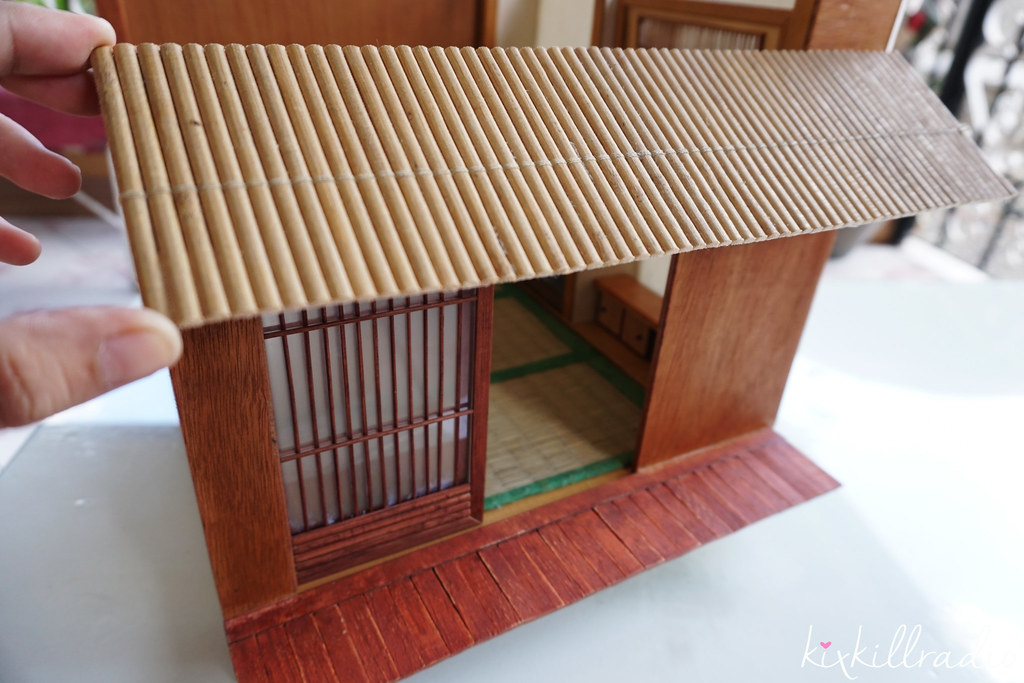 I think it looks good enough for the display.
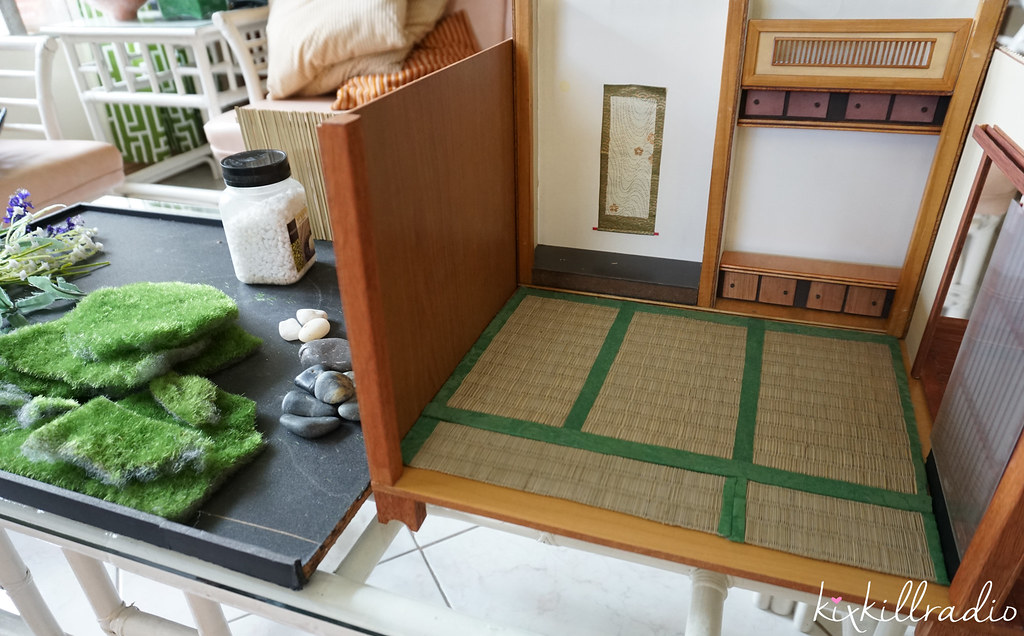 To those who haven’t seen this Japanese room before and wondering where I bought it. FYI, this was all hand-made and detachable. The reason behind it is so that I can bring it wherever I want or use the materials or parts for future projects. You might see this again in my future shoots but may be slightly different.
The material used for the wall was sheet wood that is covered with furniture sticker. I chose a sheet wood or thin ply wood so I can re-use them.
DIY Tatami mat (a present from a friend from Japan) for the floor.
Final Result:
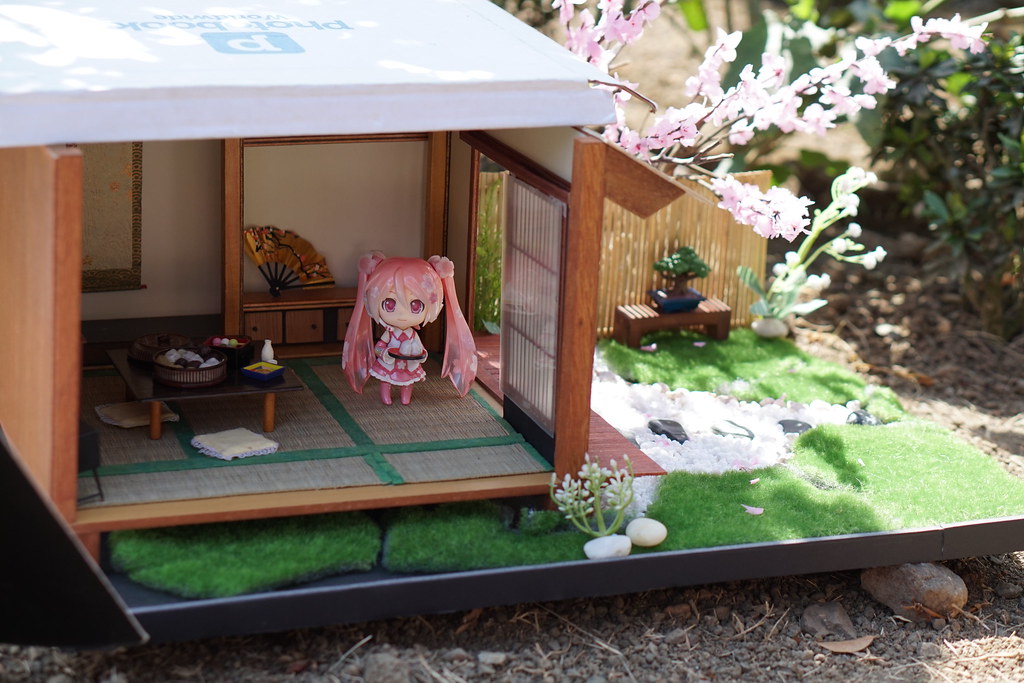

That’s all for today. I hope it gave you an idea for your future projects. 🙂

This is amazing!! I’m so glad you did this, I’ve been meaning to start building my own dioramas and starting up my toy photography! Thanks for sharing!!
P.S. I know you said the tatami mat was a DIY present from your friend, but do you have any idea how they made it? That’s my biggest concern when I decide to build this…thanks! When I have my stuff up and running I’d love to have you look at my blog 🙂
I’m glad you find this post helpful. I will try to post more tutorials when I have the time.
About the tatami mat, I’m sorry I don’t. This is the only tatami mat I have and I’ve been re-using this one too. He didn’t tell me either. I found tutorials in the internet how to make tatami mat, but the material just doesn’t seem the one I need.
This set looks very nice, it’s such a pleasant miniature scenery ;D
The fence was a good idea to limit the perspective to make the scene look more convincing and in scale. I liked to see this little behind the scenes, the grass looks so soft (‐^▽^‐)
You always do a wonderful job with these mini places for the Nendoroids and other things.
Thank you wieselhead! I think it really gives me a sense of joy whenever I build ones for my chibis. I also like to express my creativity in interior/exterior designing of nendoroid houses. I think I inherited it from my Mom. My mom designed our zen garden at home. ❤
Beautiful work! So small yet so in detail. I love it ❤
Hello Sheng! You’ve come a long way since 2012! I remember seeing your photos for the first time and I was absolutely stunned and inspired. You’re one of those few bloggers who have a very strong passion in this hobby and still keeps going, up to today. I have nominated you for the liebster award! See more here: https://gunbies.com/2016/04/27/liebster-award/
More power to you and your hobby! 😀
Hello!
OMG I was browsing for DIY Japanese room diorama and stumbled upon your site. All of them are so perfect, and I thank you for doing these tutorials ❤
Do you have any tutorials for the shoji and windows shown in Snow Miku Strawberry ryokan's photoshoot? They're like the best hand made dioramas I've ever seen ❤
HELLO!Mrs.kixkillradio.
Thank you for your tutorials.Your masterpieces really make a deep impression on me,and now I am trying to make one by myself.
There are two things I want to consult you.One is that how you get the sakura branches in the pictures?DIY or brought from the market?The orther one is I want to know whether the tatami mats are made by sewing the straw mats.
Hi! I’m no Mrs yet. 😀 The sakura branches are DIY. I also have a tutorial on how it’s done. Tatami mat was bought that way, a friend from Japan gave it to me as a gift. 🙂
Oh!Thank you very much!I am looking forward to your latest wonderful work!
Reblogged this on Ổ Dưa.
OMG! I love your works Ms. Sheng!💖💖💖 I have a suggestion for DIY tatami mats. They can use those “tatami” placemats they are selling at Japan Home or Daiso (I also saw some at Landmark Trinoma a few years ago, not sure if they still have them). They could just cut them and glue/sew the trimmings with some cloth or paper to prevent it from fraying. ✌😀
Thank you, I might check it out when I visit Manila this month. 🙂