It’s taking me a while to post a new toy photography, so I’ll be sharing you what I have done with some of my works. I don’t rely much on Photoshop because I’m not really good at it. I can see other people’s incredible work of photoshop plus toy photography and wow, the outcome is really amazing.
But since, I prefer not to use much of it, I only use Adobe Photoshop or Adobe Lightroom in post processing. Most of my works posted here are all done manually and used a little bit of editing for retouch and adjustment purposes only. I saw someone commented on one of my pictures before and said something like “the power of editing” (I think it is Ohana’s picture at the inn). Well, that was his opinion but if he has done some research and visit my blog then I think he would be disappointed. 😀
I use Adobe Lightroom in adjusting brightness, contrast, exposure and a little bit of cropping here and there if I believe it is needed so. Also, I apply noise reduction if I want my pictures to look smoother than ever. I only did a few tweaks on color temp if I want to have a more dramatic scene. I love to play with the lighting, so I would normally do it manually with my lights instead of using photo editing softwares.
 In this picture of Sawako Kuronoma, the first picture looks too yellow because of the light I used and the color hurt my eyes! So what I did is lessen the Temp and Saturation a little bit in Lightroom and viola, I think it turned out much better.
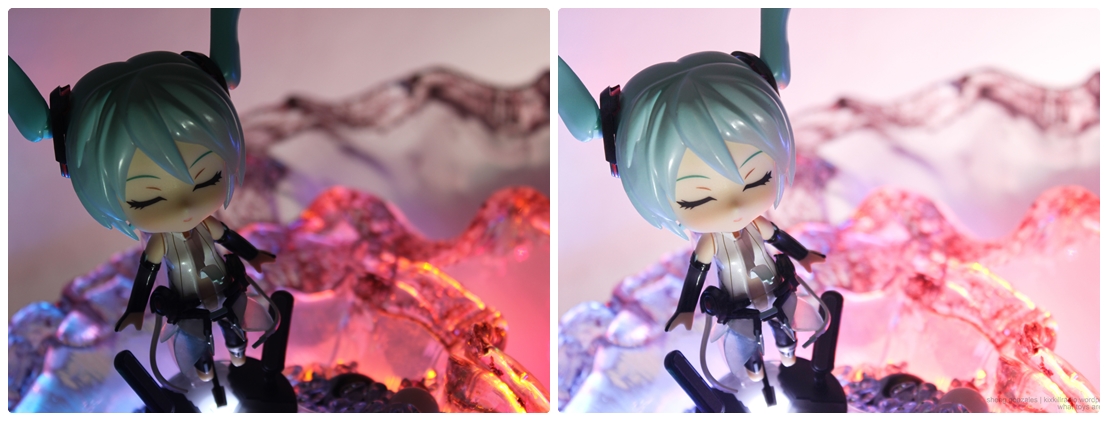
I just randomly thought of the concept of this Miku Append photo shoot. This picture is one of my early works which I only used Christmas led lights and 1 desk lamp for lighting. The lighting is so poor that I had to adjust the exposure and brightness in Adobe Lightroom. After the adjustment the picture looks more pleasing to my eyes.
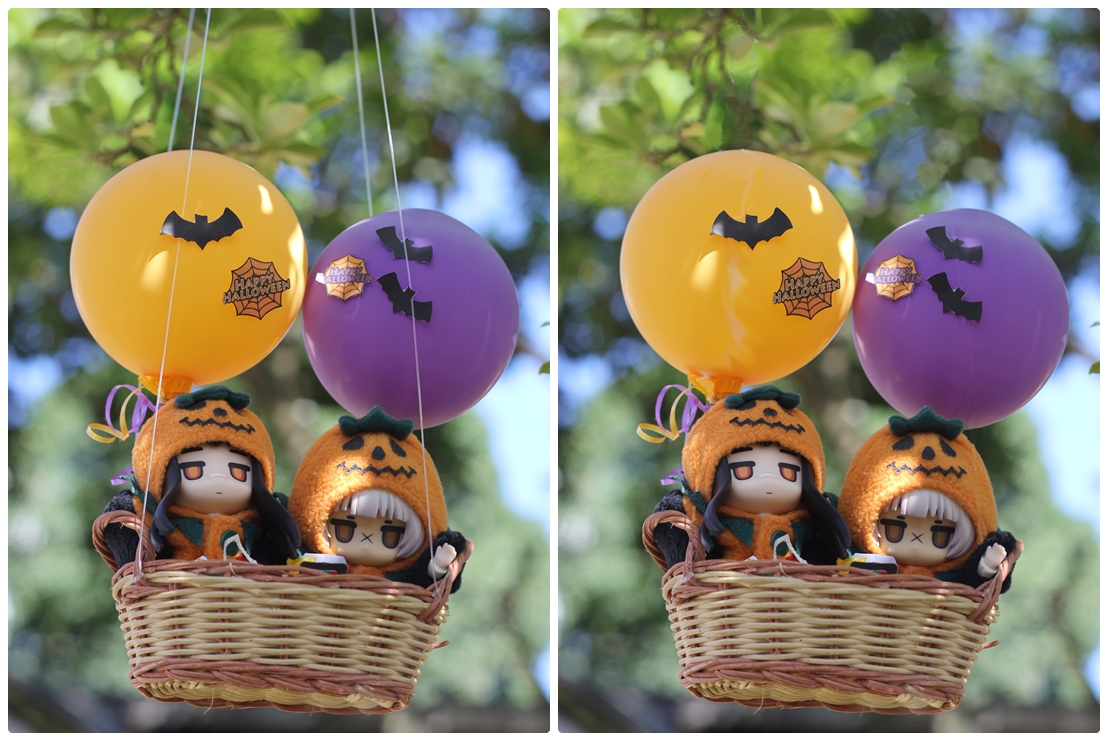
In this Halloween-inspired photo, I managed to do a little photoshopping to remove the string. So you see, I’m not really good at editing. This isn’t what I originally planned to do, but my mom suggested to put them up under the tree using transparent string. What a bright idea, so I did what she told me.
After the photo shoot I then realized, OMG the strings are very much visible on all the pictures! So I got to do a little photo editing otherwise all our hard work will just go to waste. I used clone, smudge and blur tool in Adobe CS5 because I didn’t know what else I could use of. Haha. If anyone of you know something, tutorials and tips are welcome. 😉
Luckily, one picture from this photo shoot made it to top five in MyFigureCollection last November.
In my years of toy collection, the most important is that I enjoy what I do and I highly appreciate the beauty of the figures I collect through photography. I want to share that beauty through my pictures, so other people can see what I see.
Well, that’s all for now, hopefully a new set of figure photography on my next post. I still have a couple of nendoroids and number of Scale figures to take pictures of.

Nice tips! 😀
Thanks 😀
Nice of you to show us “before” and “after”, since we rarely get to see the process of really good pics like yours.
I do all my post-processing in Picasa, since all I do is adjust color temp and some boosting. I like how I can directly share to my G+ album from it.
I haven’t tried Picasa yet, I’m still new in G+ and still clueless sometimes on sharing pictures. I’ll check it out too.
I’m getting a lot of question on how I do my toy photography, the thing is I always forgot to take pictures of the stage or the Behind the scene set up. So i can only describe through words. 😀
Thanks for dropping by Aruto-kun!
thank you:D your works are beautiful, and do you have an instagram? Because some asshole on instagram are taking credit for your beautiful photos.
Hi Erich! I have instagram but I seldom use it. My registered handle is Kixkillradio.
Thanks for dropping by and letting me know. 🙂
Is there a way to see it? or a link/hashtag?
Great tips, good to see people sharing there know how. Seeing if I’ll try Adobe Lightroom, seems to be good (have been using gimp for everything since the first year of high school)
Great tips! How awesome!
Gotta go get myself an Adobe bag of tricks now..thanks for the info mateee
Hi um we have talked on facebook before and i was wondering if you could message me and give me more tips please i would aprreciate it.
Reblogged this on Little wonderland.